Create dramatic dark skies with simple tools
In black and white photography it is all about the light, shapes and lines. Such images offer a totally different appeal from their color photo counterparts. Dramatic dark skies are a hallmark tool for stunning images. Here are some tips for getting the most from your color originals using simple tools.
Let me start with a demonstration.
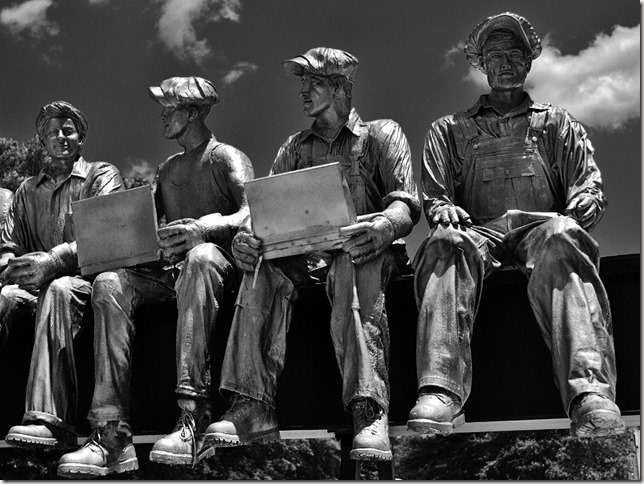
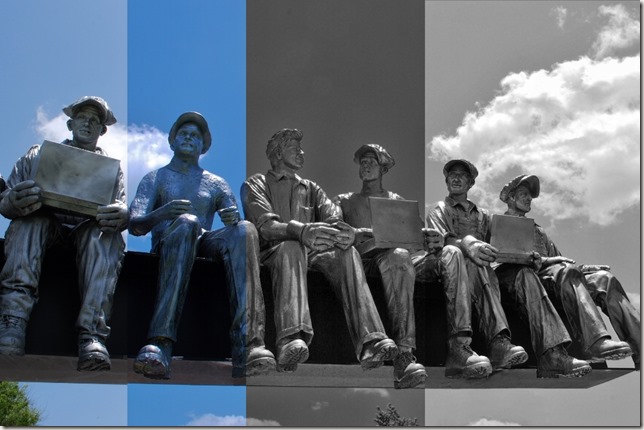
This delightful sculpture showing workers taking a break on a steel beam gleams in this photo. The dark sky and deep shadows bring life to this image.
It was derived from a rather ordinary color photo. The normal process is to use a color-filter conversion when making it into a B&W image. Pretty much all the photo editors provide such tools.
In PaintShop Pro you can pick the exact filter color from a color wheel as illustrated below. 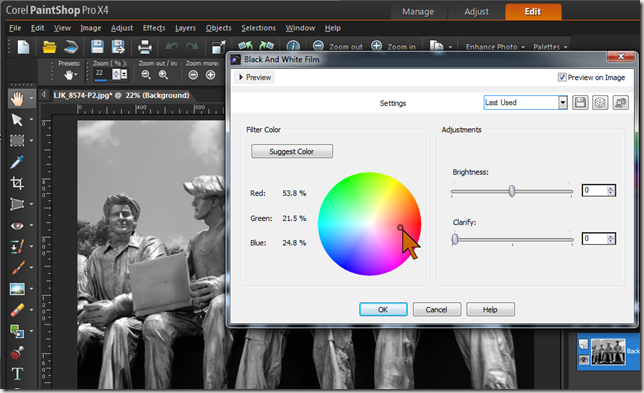
Similarly, Picasa has a “Filtered B&W” effect and the filter color is picked from a palette. 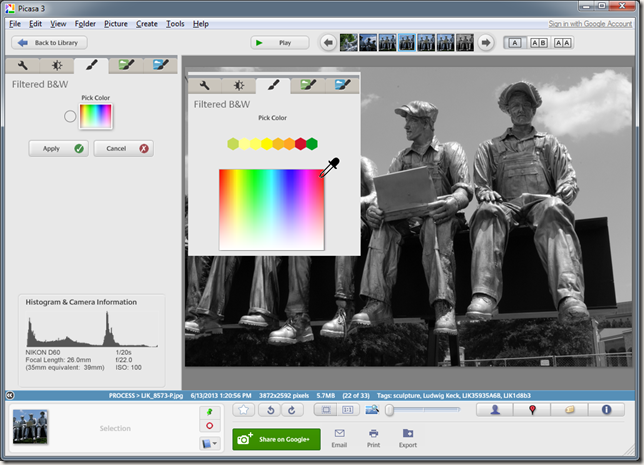
Windows Photo Gallery offers a selection of B&W effects with several filter colors. 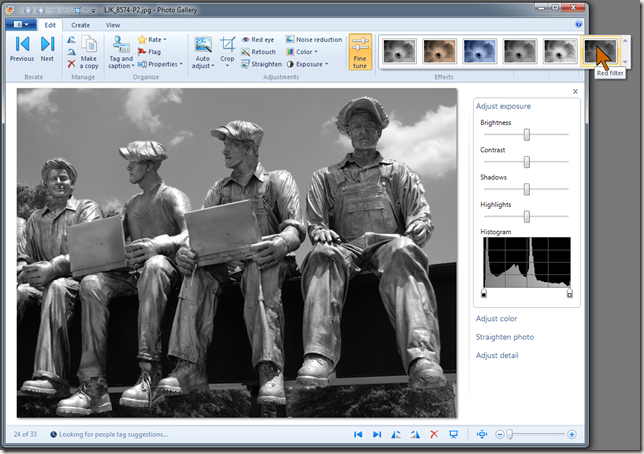
With all of these tools the reddest filter does not provide that dramatically dark, almost black, sky for a normal blue sky in a photo. There is an added trick to achieve the deep dark sky: Adjust the color saturation to a very high level. The image below shows the results. The outside (left and right) portions show the normal photo with the normal result through a red filter.
The inside pair shows a deeply saturated sky and the the resulting dark black and white image.
One note of caution: The resulting black and white image will show a good deal of mottling in the formerly blue areas. A uniform sky will make this even more noticeable. So make the conversion in the largest image that you have. Make any size reductions afterwards to maintain a clean sky.
This post was also published at Photography Notes and Tips.
.:.
© 2013 Ludwig Keck


